Cornify Sharkify

Thursday, 12 November 2015

Traditional Rose - Attempt 2.

I've been working on this one for the past few days (2 or more days to be more precise), as a disclaimer I'd like to mention that the colours used by myself look different in person than they do on the images, in person the blue is more of a blue/green, but on the photos it looks like a royal blue of sorts.

The materials used are as follows: 
- Reeves Pencils, H and 4B
- Faber-Castell Polychromos Pencils
- Faber-Castell PITT fineliners, XS and F
- Daler Rowney Cachet Sketchbook (A3)

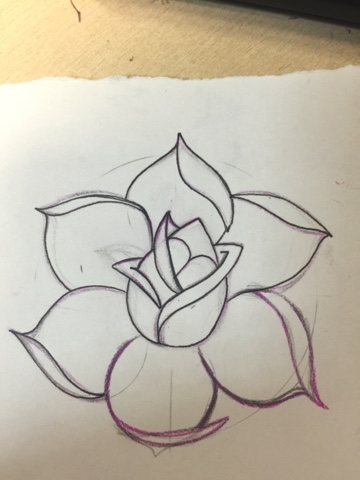
As always I'm going to include a series of step-by step images to show you the process I went through and to show you it was my own work, and isn't traced. 


The reason I've applied a filter to the final image, is because the filter makes the drawing look as close to the original colour as possible. I will also include a non-filtered image below.
As I've said, the photo makes the colour look more of a royal blue, but overall I'm happy with the finished product, on the same page I'm going to be doing other roses in different colours, hopefully looking at adding gradients for shading and other things, one step at a time.

After posting this image on Facebook, I received a message from a friend which has really been a confidence booster for me, it's nice to know people's opinions of my work, I'm going to share it below, but for obvious reasons I've deleted out the persons surname. 

Lovely words from my friend; it's unfortunate that the compliments also come from her still grieving over a lost friend. I'll do my best to design something for her and her lost horse.
Since the comment from my friend was so thoughtful; I've decided to dedicate this post to Maestro the horse, who sadly passed away on the 8th of January 2013. 

The Binding of Isaac: Afterbirth

This game has taken up so much of my time today, I have been working on a rose drawing too, but I'm too easily distracted by the new content!
The Ultimate Time-Waster.

It's basically a game where you play as a young boy, his mother has gone crazy and believes that God wants her to kill her son, and then it just gets really weird and you have to fight weird monsters and collect weird items until you get to the ultimate boss fight and fight a dead version of yourself.
It's all over the place but it's great fun.
An example of some of the weird monsters you have to face! 


Tuesday, 10 November 2015

Traditional Rose - Attempt 1.

Now, I think it might be worth mentioning, that whilst this is a first attempt, it was done as a doodle in the quiet periods at work, I didn't have my normal supplies on me, but I wanted to try to work it out anyway. 
Below are the tools I had to work with!
As you can see, the red pencil is almost non-existent, so as you can imagine the red colouring is nowhere near the standard is like it to be, but overall I'm happy with what it looks like, and it gives me some confidence to draw a larger one in my sketchbook. 
The paper I used was scrap at work, so I'm assuming it's just standard printer paper. 
The pencils are a mix that I just happened to have on me, the only thing that I had on me that I use normally was the PITT Faber-Castell XS pen. 

The following pictures follow the tutorial in the previous post, and are used to show progress and to prove its not traced! Enjoy!


It might also be worth pointing out that I didn't have my compass on me, so to get my 'perfect' circles I used a plastic cup for the larger one, and a glue stick lid for the smaller ones, for the straight lines I used my work ID card. It definitely helped to have accurate circles instead of free handing them; I'm hoping in the future to do a study in my sketchbook of different media to colour the rose. I'm thinking of using things such as alcohol markers, watercolours, Faber-Castell pencils etc. 

Below I've included an image of the cup and glue stick, just to show you all!
(For data protection reasons I can't show you my work ID card, but it's the same thickness as a credit card, and the same size also.). 


Thoughts on Roses.

I've been trying for a while to find good  tutorials on how to draw roses in different tattoo styles; traditional, neo-traditional, etc. 
I've found the below tutorial which I think touches more upon American Traditional (I'm not sure if this is the right title for the style!), it starts with a shape where a larger circle encompasses a smaller one, like a fried egg! On paper this looks relatively simple, but I'll be putting it into practise soon and seeing what I can make of it. 
The tutorial below was posted on Pinterest by a user who didn't cite the source, so I'm unsure who made it. 

Picture 1 - Steps 1-4. 

Picture 2 - Steps 5-7. 

It's also worth mentioning how brilliant it is that the creator has started it off with a simple pattern to follow, and has followed it through right until the colouring at the end, showing how easy it is to turn those shapes into an end product. 


Sunday, 8 November 2015

Old-School Style Woman - Attempt 1.

After trawling the Internet to find some tutorials to begin learning tattoo style, I stumbled across a YouTube channel called 'thebrokenpuppet' ran by Rick of Brokenpuppet Tattoo in Worthing, UK; I have never met this artist or visited the store, I only know him via his YouTube channel. 
The link to his channel is: 
https://m.youtube.com/user/thebrokenpuppet/

The link to the tutorial I used for this drawing will be below. 
The materials I used to draw this are as follows:
- Faber-Castell Polychromos pencils. 
- Faber-Castell PITT fine liners and brush pens. 
- Daler Rowney Cachet sketchbook
- Reeves pencils (assorted weights) 

Picture 1 
This picture was taken shortly after finishing the basic outlines for my drawing, after this I changed the shape of the hair and other small aspects, you can still see the guidelines I used slightly in this image also. 

Picture 2. 
This picture was taken in a darker light, and that means the actual drawing is difficult to see; but here you can see the development of the outlines and some guidelines for when I use the fine liners, the shape of the drawing is finalised at this point. 

Picture 3. 
This is the final product, the greys were used first and the white highlights were added lastly. There were a few small mistakes made with this drawing, but overall I am happy with the finished product (especially as it's only a first attempt!) 

I had a lot of fun drawing this, and if anyone is wanting the tutorial I used myself, the link is as follows:

Bonus picture!
A small, 10 or so minute doodle I did at work during a slow period! Not in the same level as the image above but practice makes perfect!

Saturday, 7 November 2015

Introduction.

Let me introduce myself a little; when I was younger I fell head over heels in love with art, and I've stayed that way to this very day(and many more days to come), I have discovered many art forms along the way, but none that have caught my eye quite like tattooing; the idea of creating something everlasting is beautiful. Making artwork that someone will proudly wear on their skin is such an amazing concept, it can never be hung in a gallery, as it will always be hung from a person, who will wear it and exhibit your work in untold corners of the world. 
I want to make my mark on the world. 
My name is Bethany, and this is my journey into becoming a tattoo artist, I'm going to be learning basic tattoo drawing techniques and sharing my work and my courses here with anyone who will read it. At this point I'm not ready to be a tattoo artist as I have too much ahead of me to learn, but that's half of the fun, isn't it?

Some important points: 
1. Scratching is not something I will ever resort to. I'd rather wait years to achieve my dream than sit in my kitchen tattooing sub-par for a fiver. 
2. I don't expect anything to be handed to me, nothing comes without working for it!
3. let's do this!